Image Uploads in UMP
When you upload images to UMP, we upload them to IPFS and only store the "CID" on the blockchain. This ensures that the image is stored permanently 1 and without costing you any gas.
Uploading a new image
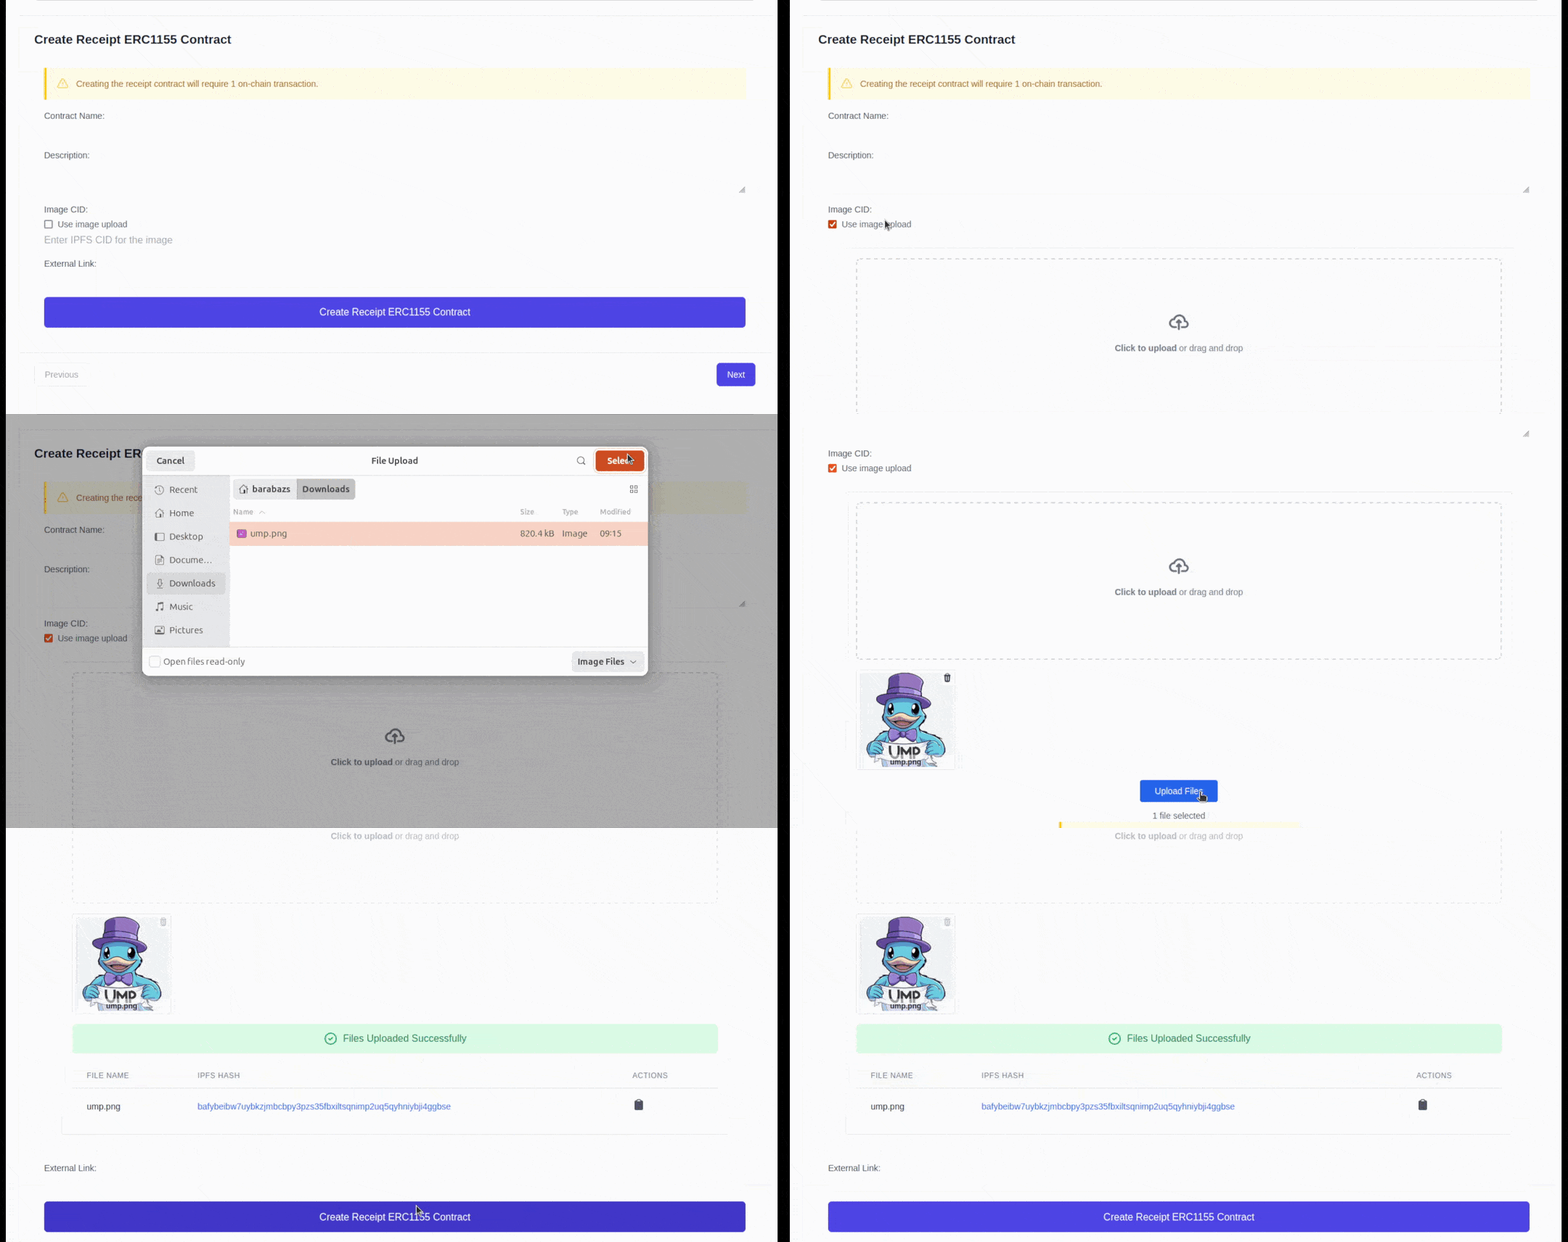
Image fields open on the uploader, with "Use image upload" ticked.
- Either click the "Click to upload" button to select an image from your computer, or drag and drop an image onto the upload area.
- Click on "Upload Files" to upload the image.
- You should see:
- a confirmation that the files were uploaded successfully.
- A table with the file name and the corresponding IPFS Hash (CID).
- The CID is filled into the field for you.
Using an existing image
If your image is already hosted on IPFS, untick "Use image upload" and paste its CID into the text field.
Note
When a field already has an image, it opens on the text field with the current CID instead. This happens when you edit a storefront or listing, or go back to an earlier step of a wizard. To replace the image with a new file, tick "Use image upload".
Example CID
A typical IPFS CID looks like this:
Or like this:-
As long as it is pinned by an IPFS node, the image will be available. ↩