Creating your storefront
This guide will help you set up and manage your store on UMP. Our platform makes it easy to sell physical items while protecting both you and your buyers.
- Visit the Seller Dashboard and click on "Create Storefront".
- Follow the steps in the wizard to create your store and list your first item.
A storefront consists of 2 contracts
- A Receipt ERC1155 Contract, which is used to create and manage the tokens that represent your items. The buyer receives receives a Receipt ERC1155 after paying for the item.
- A Storefront Contract, which is used to list your items for sale and manage your orders.
Don't Forget to Confirm
Each step in the wizard requires a blockchain transaction. Click the blue button at the bottom of the wizard to trigger it, then confirm the transaction in your wallet before clicking Next.
1. Create Receipt ERC1155 Contract
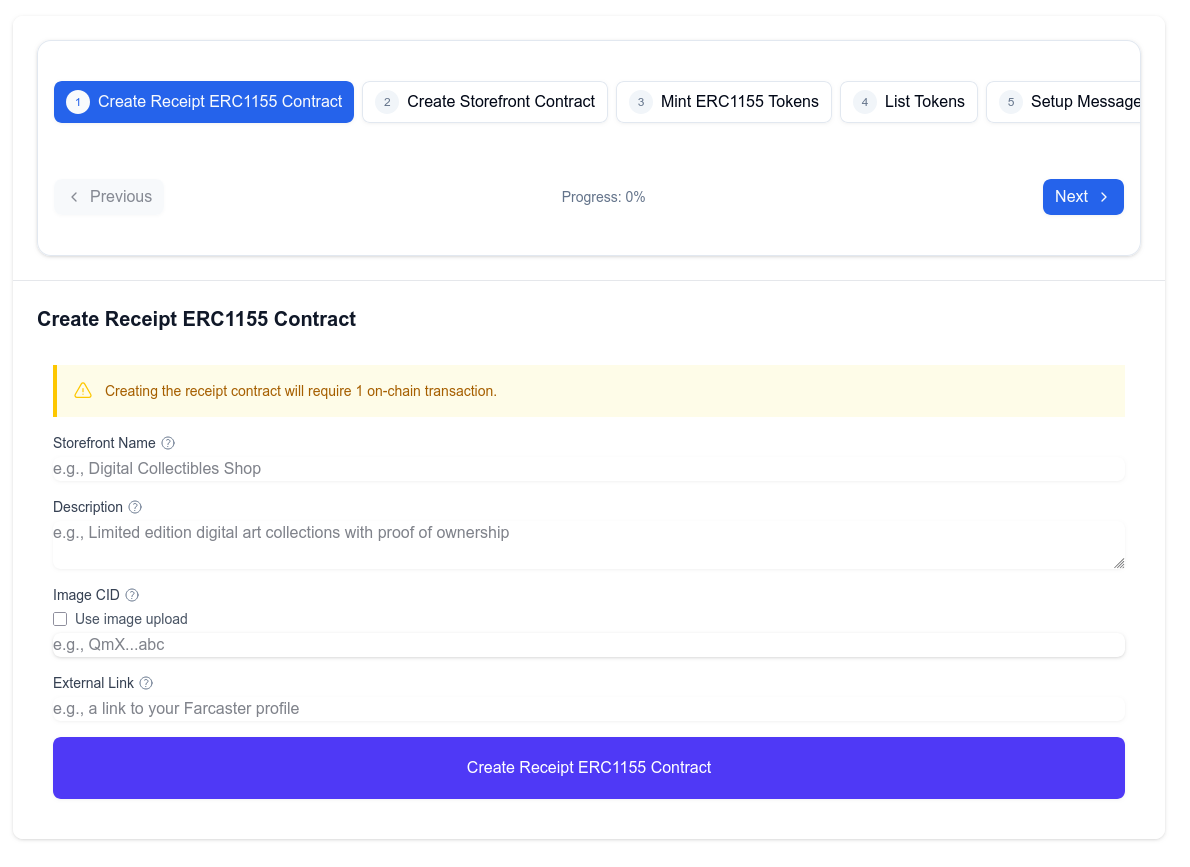
- Storefront Name: The name of your store
- Description: A description of your store
- Image: An image or logo for your store (learn more)
- External Link: A link to your social media or website
2. Create Storefront Contract
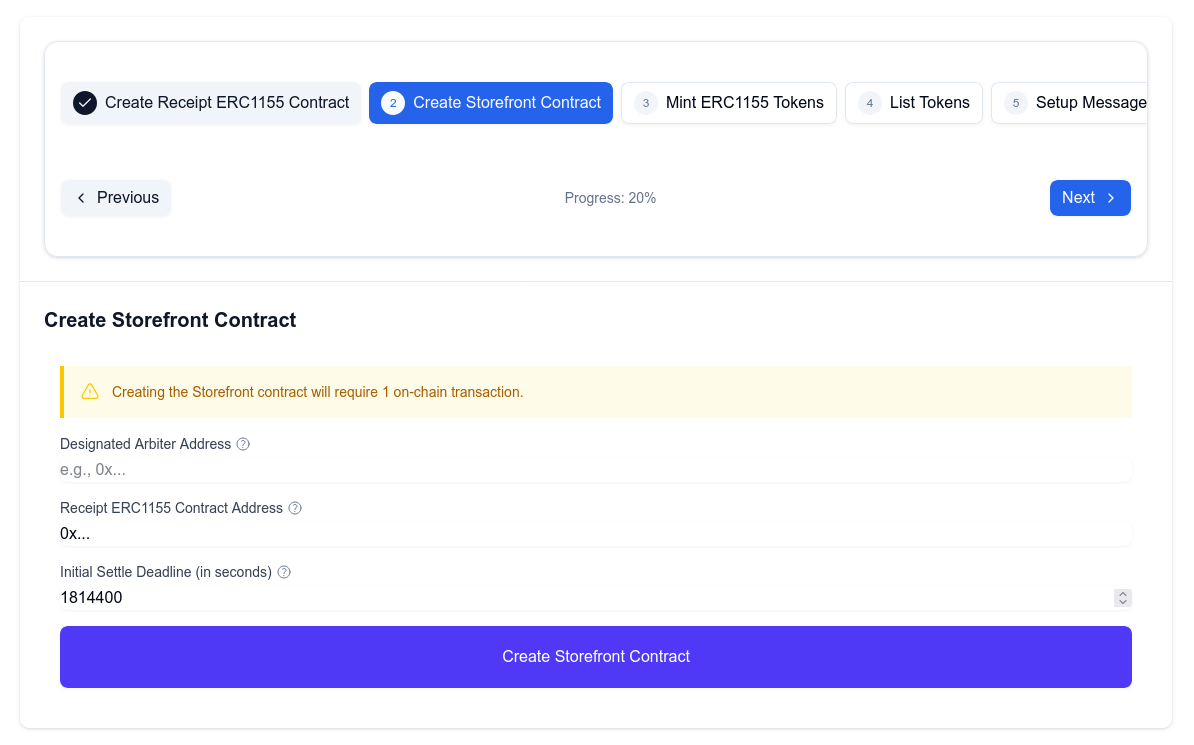
- Designated Arbiter: The arbiter that will be used to resolve disputes
- Receipt ERC1155 Contract Address: The address of the Receipt ERC1155 Contract (should be pre-filled)
- Initial Settle Deadline (in seconds): The amount of time the buyer has to confirm the receipt of the item (minimum 3 weeks)
3. Mint ERC1155 Tokens
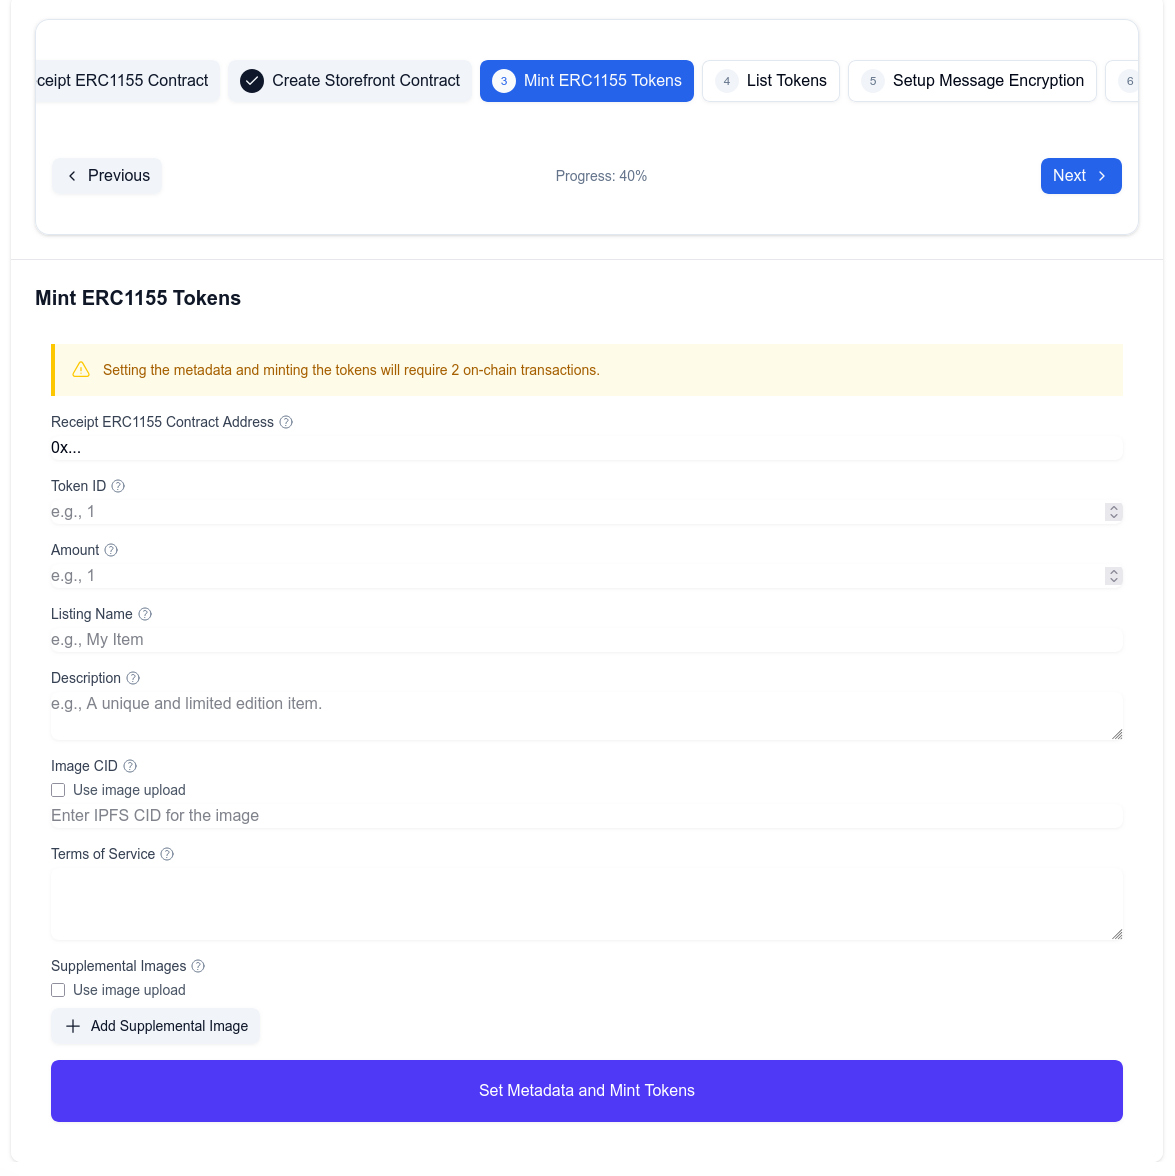
- Receipt ERC1155 Contract Address: The address of the Receipt ERC1155 Contract (should be pre-filled)
- Token ID: The ID of the token you want to mint
- Amount: The amount of tokens you want to mint
- Listing Name: The name of the token
- Description: A description of the token
- Image CID: The IPFS CID of the image for the token (learn more)
- Terms of Service: The terms of service for the token
- Supplemental Images: Additional images for the token (learn more)
4. List Tokens
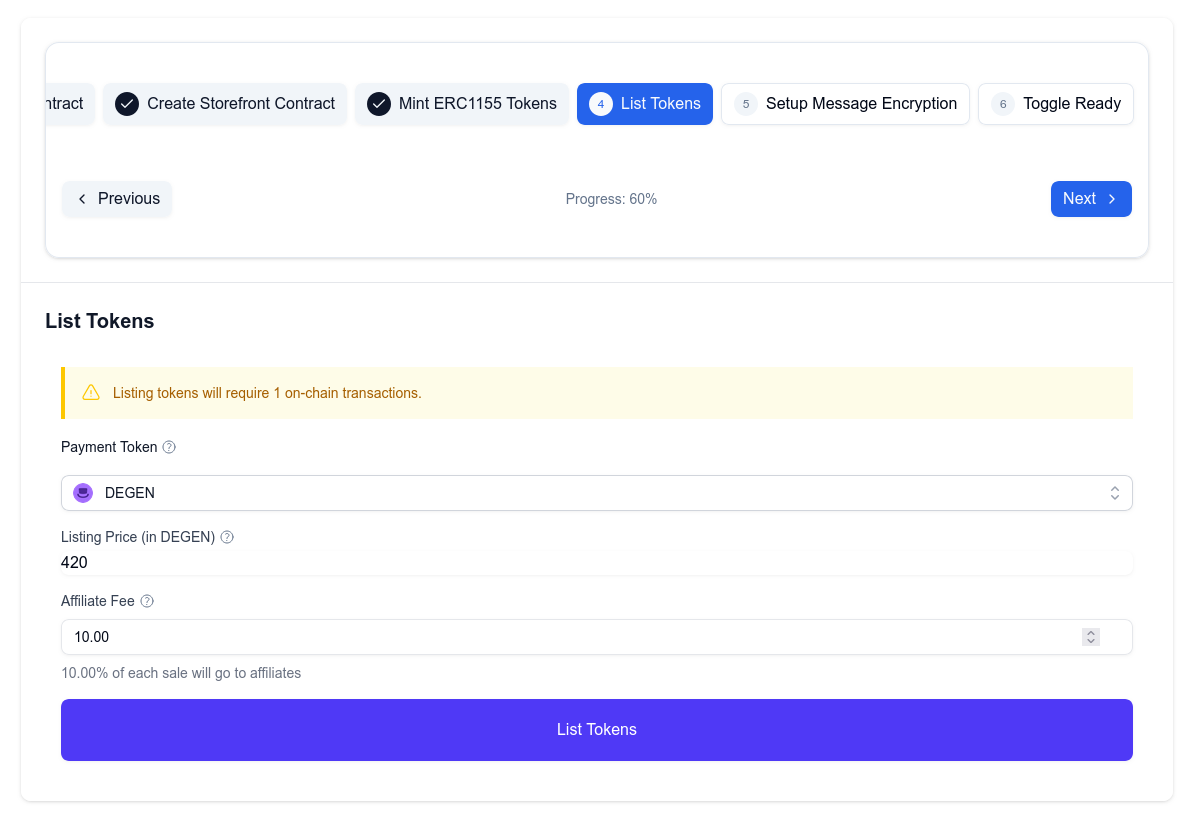
- Payment Token: The token you want to use to pay for the token
- Listing Price: The price of the token
- Affiliate Fee: The affiliate fee for the token
5. Setup Message Encryption
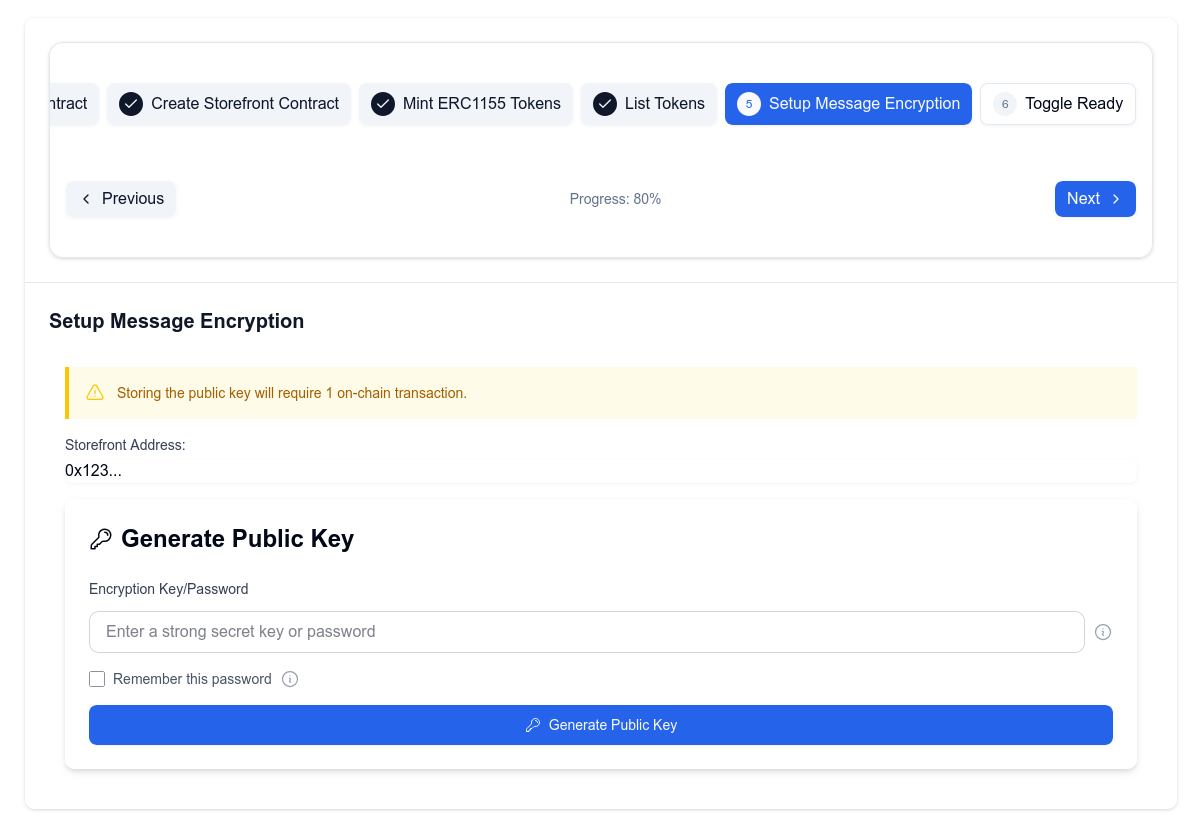
In order for the buyer to be able to submit shipping details, you need to setup message encryption. We're using a combination of your wallet and a password to generate a public key. The public key is used to encrypt the shipping details and the encrypted message can only be decrypted using your password and your wallet.
You can learn more about the encryption process here.
Enter a strong password, click on "Generate Public Key" and confirm the transaction in your wallet.
6. Toggle Ready
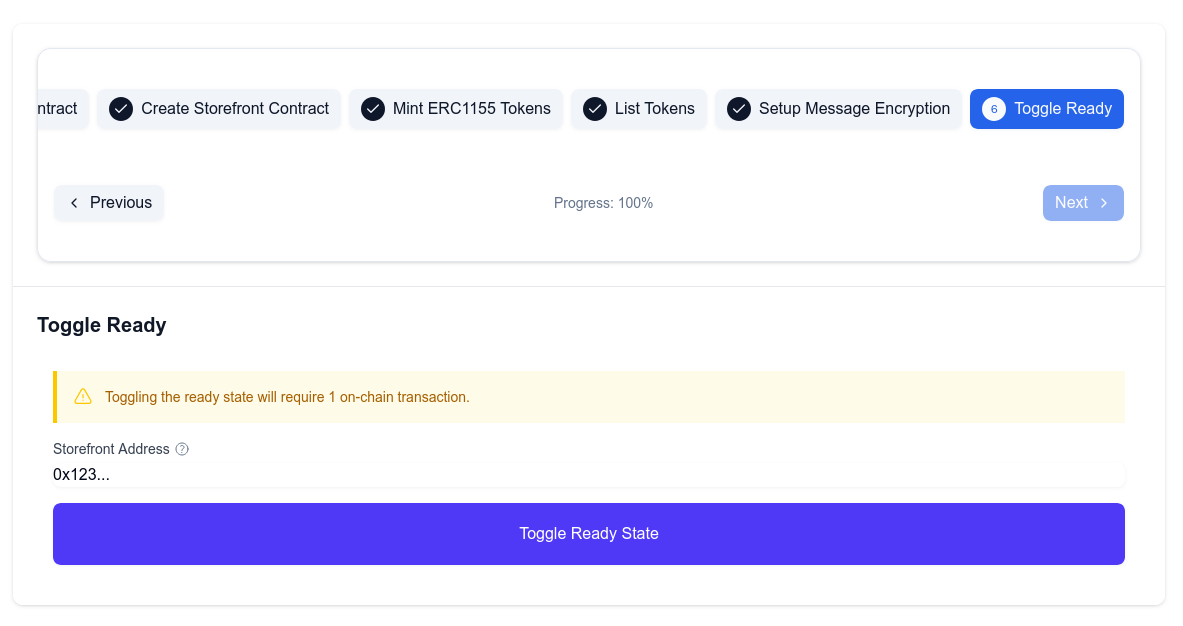
The final step before you can start selling, is to activate your storefront. Click on the "Toggle Ready" button and confirm the transaction in your wallet.
 You're all set and ready to start selling!